ATV Tire Repair Kit and Guide to Fix It

Table of Contents

This guide will help you find the best ATV tire repair kits and know what you can do to repair your tire that is leaking. Having a leaking flat tire is inevitable. You would not know precisely when it would happen. As such, you need to be prepared for it. You do not always need to bring it to a mechanic because you can do it by yourself and with your tools. ATV tire repairs can be learned.

Certain leaks are not considered an emergency because they are too small, and the repair can wait. However, bigger leaks need to be fixed immediately so you can continue driving. This is why you must have a toolkit with you anywhere you go.

Tools You Might Need

ATV tires are more than just inflatable components that keep ATVs and other small off-road vehicles moving. They also act as the ATV’s suspension system, for absorbing shocks from uneven terrain. ATV owners should know how to fix ATV tire problems with the help of an ATV tire repair kit so they can avoid expensive trips to the repair shop or dealership. Here are the necessary tools you might need for repairing an ATV tire:

Air Compressor

Air pressure in tires is important for ATV safety and performance. Owners should keep the ATV’s tires well-inflated at all times. You can use an air compressor to inflate ATV tires before heading outside for a ride, before performing ATV tire repair or maintenance, and after checking ATV tire pressure as part of routine ATV routine inspection.

Pressure Gauge

This is a necessary tool for ATV tire repair, ATV tire maintenance, ATV tire inflation, and ATV routine inspection. ATVs can operate at low air pressure for short periods but it is recommended that ATV tires are inflated to the maximum PSI (pounds per square inch) amount indicated on their sidewalls. ATVs can be equipped with ATV tire pressure monitoring systems (TPMS), which are sensors mounted on ATV wheels to measure air pressure; however, these TPMS will only work if ATV tires are deflated.

ATV tire repair kit

Tire Plug Repair Kit

ATV tires are constantly driven over rough and rugged terrain, so ATVs owners should regularly inspect ATV tires for leaks and other damage. Owners who spot ATV tire problems should fix ATV tire issues before they become serious – e.g., before the ATV tire goes flat or starts leaking air excessively that can lead to ATV tire failure. Tire plugs are one of the ATV tire repair solutions for ATV owners. ATV tire plug kits contain a variety of rubber plugs, metal buttons, and rivets that can be used to repair ATVs with small holes in the sidewall or tread areas.

Extra Soapy Water

To make sure the plug fixed the puncture, ATV owners should use soapy water to check for leaks. ATV tire plug kits also include a tube of soapy water for this purpose. To test ATV tires, wet the area around the puncture with soapy water and spray soapy water on the ATV tire plugs. Owners should look out for air bubbles that mean ATV tire plugs did not stop ATV tire leaks.

6 Best ATV Tire Repair Kits

Now that you know about all the components, here is the perfect tool review that you

can use to accomplish those tasks.

AstroAl’s Pressure Gauge

Sale
AstroAI Digital Tire Pressure Gauge 150 PSI 4 Settings for Car Truck Bicycle with Backlight LCD and Non-Skid Grip Car Accessories, Silver (1 Pack)
  • Check out our VIDEO on the left side and take a quick tour of AstroAI tire gauge! Backlit LCD display and Lighted nozzle for visibility in dimly light areas, stocking stuffers for men and women
  • Designed to maintain correct tire pressure, reduce tire wear and extend tire life; Digital display reading instantly and clearly being shown, no longer do the guesswork of analog gauges
  • Nozzle easily forms a seal with the valve stem on Schrader valves and Presta stems with valve adaptor if you need, giving quick and accurate readings in 0.1 increments; 4 settings with range: 0-150PSI / 0-10Bar / 0-10Kgf/cm² or 0-1000KPA
  • Simply press "ON/UNIT/OFF" button to turn on the tool, select the range, and automatically shut off in 30-40 seconds to save the power; Non-slip texture makes it easy to hold onto and the ergonomic design is both suitable for men and women's hands. Gauge automatically resets when taking pressure, no need to calibrate or reset the device
  • Battery included; Perfect car accessories gifts for men; Versatile use for cars, trucks, motocycles, bicycles etc

AstroAl’s digital pressure gauge is perfect for ensuring that just the right amount of air pressure is incorporated into your tire. It shows immediate reading, so there is no need to read analog gauges. It can easily be attached to the valve stem and has a simple on and off button. It also has a power-saving feature by automatically shutting down when not used. As you can see, it is very portable and can easily fit into your tire repair kit.

What We Like

What We Don't Like

Tooluxe 50002L Repair Kit

Sale
TOOLUXE 50002L -35 Piece Tire Repair Universal Heavy Duty Tire Repair Kit with Plugs, Fix A Flat Tire Repair Kit, Ideal for Tires on Cars, Trucks, Motorcycles,...
  • VERSATILE TIRE REPAIR KIT: This flat tire repair kit includes an easy and quick plug kit to fix punctures for all tubeless tires on most cars, trucks, motorcycles, ATV’s or vehicles with no need to remove the tire from the rim.
  • DURABLE TIRE KIT: Our fix a flat tire repair kit includes a hardened steel spiral rasp and insert needle with a sandblasted finish for extra durability to repair heavy duty tires.
  • DESIGN: The T-handle puncture repair tool has a design that provides greater turning power and comfort to the user.
  • QUICK REPAIR KIT: This patch and tire plug kit comes in a storage case that is ideal to keep in your car for roadside emergencies while organizing your plugs, repair tools, etc.
  • COMPLETE SET INCLUDES: This tire repair kit with plugs comes in a blow mold case that keeps organizing your plugs, and repair tools easy. Each kit includes: 1 T-handle insert tool, 1 T-handle spiral probe tools, 2 Hex keys, 30 String plugs

This universal tire repair kit includes the following pieces: 30-pc 4″ string plugs that you can use for several repairs, 1-pc rasp tool, 1-pc insert tool, 2-pc hex keys, and one sealing lubricant. Ideally, it would help if you had this with you if you experienced off-road emergencies. All the essential tools that you need for tire repairs or changing tires are already here. It also comes in a durable storage case, so there is no need to worry about your tools getting lost or damaged.

What We Like

What We Don't Like

Slime 20088 Valve Tool

Sale
Slime 20088 Valve Tool, 4-Way, Plus Valve Cores for All Types of Tire
  • Meet the complete set for valve core care. Removes valve core, re-taps threads inside, re-taps threads outside and reams inside valve
  • Compatible for all vehicle valves as well as air conditioning units
  • Use the 4-in-1 valve tool to remove the valve core, re-tap threads and ream the inside of the valve
  • Consists of four valves cores to replace the ones that are removed while working

Slime’s 4-way valve tool is compatible with all almost all types of vehicle valves. If you want to remove your stem core valves easily, use this tool! It is recommended to replace the old ones since it has four-valve cores. Replacing core valves is necessary to monitor the amount of air pressure on your tire. It will be convenient for your tire repair kit.

What We Like

What We Don't Like

Milton Head Pencil

Milton S-921 Pencil Tire Pressure Gauge, Passenger Car, With Built-in Deflator Valve, Durable Plated Brass, Pressure Measured In PSI & kPa
  • MILTON: Pencil Gauges made with machined parts, unlike our competition! Made in the USA.
  • INCLUDES: Built-in deflator valve, single chuck head, and white nylon indicator bar.
  • PRESSURE RANGE: Measures PSI (5-50) in 1-lb. increments and Kilopascal (40-350) in 10-kPa increments.
  • IDEAL: For passenger car applications. Handy in cold temperature weather conditions.
  • CAR SAFETY/MAINTENANCE: Ideal automotive and road trip accessory tool to maintain optimal tire care and prevention.

This pencil gauge looks unique and is manufactured well. It has a built-in deflator valve and a single chuck head. There is also a white nylon indicator bar to know the amount of tire pressure present. This is an accessory tool you would surely wish to bring with you for optimal tire care. The gauges are made of plated brass, so you can expect them to be very durable.

What We Like

What We Don't Like

AstroAI Digital Tire Inflator

Sale
AstroAI Digital Tire Pressure Gauge with Inflator(3-250 PSI 0.1 for Display Resolution), Heavy Duty Air Chuck and Compressor Accessories with Rubber Hose and...
  • ADVANCED ACCURACY: Professionally calibrated to always return an accurate reading within 1% of the exact pressure of your tire. Accurately measures FOUR DIFFERENT UNITS in a range from 3-250 PSI (0.2-17.2 Bar; 0.21-1724 Kpa; 0.2-17.5 kg/cm^2). Stocking Stuffers for Men
  • ALL-IN-ONE FEATURES: The LED backlit screen features measurements in PSI, KPA, Bar, and Kg/cm^2; Includes an inflator, straight locking chuck, gauge, hose, bleed valve, all in one unit, ideal for cars, bicycles, motorcycles, balloons, air cushion, sports balls and so on; Compatible with ¼” NPT air compressors output
  • INCREASED SAFETY: Properly inflated tires provide better performance in all weather conditions, decreasing the likelihood of flats, explosions, and crashes; Increase your MPG and save money on fuel costs and tire wear
  • SUPERIOR CONSTRUCTION: Built of high quality, heavy duty stainless steel and brass components that provide lasting performance; Use for all vehicles, such as Cars, SUVs, Trucks, Motorcycles, Bicycles (with Schrader valve), RVs, and more!
  • SAVES BATTERY LIFE AND MORE: Automatically turns on and will also turn off after 20 seconds of inactivity to preserve battery life; built-in air bleeder valve to quickly decrease pressure in overinflated tires

This digital tire inflator provides superior accuracy in measuring the air pressure inside your tire. It comes with a digital gauge that can measure a vast pressure range. It is an all-in-one package because it also includes other necessary components such as an inflation gun, hose, chuck, and bleed valve. Imagine getting all these in one unit. You will indeed feel safer when you use this tool to inflate your tires. Its performance in all types of weather conditions is far superior to others.

What We Like

What We Don't Like

Slime 10008 24 Accessories

Sale
Slime 10008 Flat Tire Puncture Repair Sealant, Prevent and Repair, Tubeless Mower and ATV Tires, Non-Toxic, eco-Friendly, 24 oz Bottle
  • Slime Tire Sealant seeks out and instantly seals tubeless tread area punctures up to 1/4" (6mm) using Fibro-Seal Technology.Fit Type: Universal Fit
  • Use Slime Tire Sealant with an air source to prevent and repair tire punctures for up to 2 years on all your off-highway tubeless tires! Stops slow leaks and is quick, easy and safe to use
  • When a puncture occurs, Slime’s patented sealant is carried directly to the source. The pressure of the escaping air forces the particles into the opening, where they build up and intertwine to form a long-lasting, flexible plug
  • Perfect for preventing and repairing flat tires in all non-highway tires: Golf carts, riding lawn mowers, small trailers, tractors, scooters and all other non-highway tubeless tires
  • Environmentally friendly. Non-toxic, non-corrosive and non-hazardous, Non-flammable, Water soluble

This is a tire sealant that is perfect for tubeless tires. Punctures can easily be sealed using this. What’s good about it is that it is safe to use because it is non-flammable and has no toxic effects. It can easily be cleaned with water so you can use it from one puncture to another. When air escapes from the tire, it would cause the sealant to take effect into the puncture hole. This product lasts for two years so consider yourself having a good investment when you purchase it.

What We Like

What We Don't Like

Best ATV Tire Repair Kit

Guide To Fix Tire Leak

Finding the Leak

Needless to say, before you fix your ATV tire, you need to know where the leak is. The most common places where tire leaks can be found include:

  • Pierced tire
  • Leak in the space between the tire and its bead or rim
  • Tire valve
  • Damaged rim (cracked or bent)

Here are some things you can do to find the leak on your vehicle’s tire quickly.

Listen carefully

If the leak is big enough, it would usually produce a “whooshing” sound that you can hear with your bare ears. Once you know where it is, proceed to the next step.

                                             ATV tire patch kit                                                         
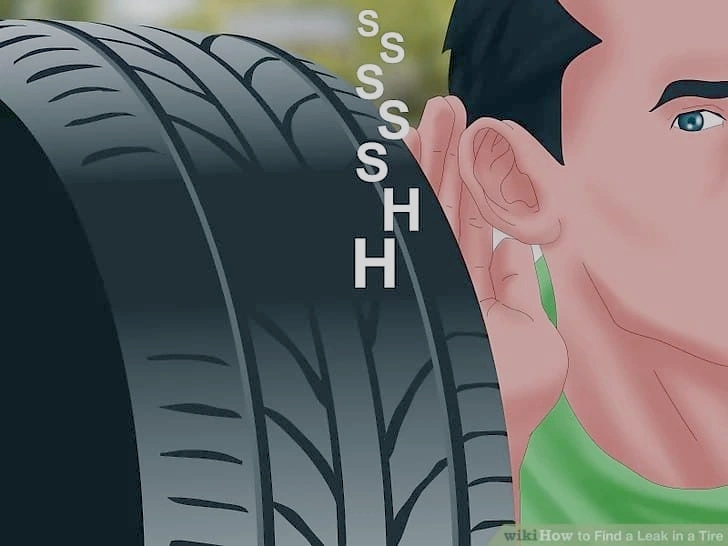
Image Credit:  wikihow

Put water with soap

Smaller leaks are harder to locate but do not fret because there is another way. Get some water with soap and spray it on your tire. You should see some bubbles getting out of the tire where the leak is. It’s a very simple job, right?

If soap is not available, even plain water will do the job. However, you need to look closely at your tires keenly to see the bubbles. Once you have located the leak, you can apply some spit on it since it produces more bubbles than your water.

Know De-beading and Re-beading Procedures

As a prerequisite, you should also know how to remove your tire from the rim because some steps in this guide will require you to do so. It may seem difficult at first, but do not worry because you can also do it independently. However, if you cannot achieve your desired results, you can bring them to an auto shop or an expert.

Breaking the bead of your ATV tire

You have several options on how you want to do this. These recommendations are for those who do not want to spend too much on tools rarely used.

The first method is through the use of Beadpro spoons. These tools are not expensive and can be used easily. However, the disadvantage is that it would take longer to perform the entire process with this tool. The package usually includes instructions that you can follow. Before you break the bead, you need to deflate your tire completely. Locate the tiny valve pin on your tire and press it down to suck the air out of it. To make things faster, a valve-stem removal tool can be used. You can buy this tool at a meager price. These tools are very small and can be brought quickly with the other tools on your kit.   

 ATV tire plug kit

Another option is using a bead-breaker. This can be used together with your tire spoons and valve-stem removal tool, all of which are very much accessible in local stores. Some people do not prefer this method because the price is a bit expensive (around 100 dollars). If you know of a do-it-yourself method that can replace this one, it would be better because you will save money. A separate article is being done for this DIY tool, which will be released soon.

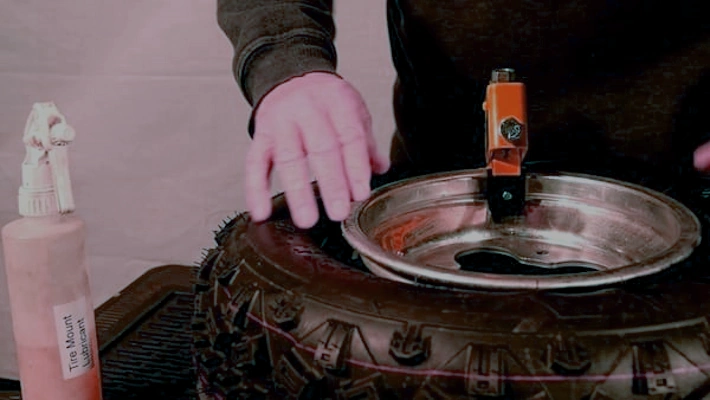
Reattaching the rim to the tire

The materials needed for this step are the following: air compressor, simple air chuck, and soapy water. You may also need a ratchet strap if things do not work out.

Begin by applying adequate amounts of water mixed with dish soap to the beaded rim. This will make things more slippery for easy removal. Lubricating these parts will make it easier to consider the pressure on your ATV tires. Again, use your valve stem removal tool to inflate your tire. Use your air chuck to fill the air. Once you hear a “popping” sound, it means that the tire has already been attached to the bead. You should listen to the pop on each side of the tire.

If that method is unsuccessful, use your ratchet strap by encircling it around the entire tire. Grasp it tightly and watch the walls of your tire get pressed over the beads. A lesser amount of air would be required to seat the tire. Similar to the first method, use your air chuck again. Do not overinflate since a strap is wrapped around your tire. Put just enough air in for the tire to be seated. Once done, remove the strap with precaution since there is a high pressure released with power.

Video Credit – Essential Craftsman

Remember not to put too much pressure on your tires. You should hear two popping sounds to confirm that both sides of the tire are already beaded. Remove the chuck and attach the valve stem core to put back air on the tire. You may use a tire inflator with the gauge to determine if you have already reached the desired amount of pressure. Usually, you will need 15 lbs or 1 bar of air pressure to have it properly seated. Those tires with tighter walls require a higher pressure (around 40 lbs). Check the maximum capacity of your tire. Do not exceed this level for your safety. Also, your tire will get damaged if it cannot handle the pressure you have incorporated. It can blow up and even cause injury to people nearby.

How to Fix a Rim Leak

Since ATVs are more commonly used off the road, where debris is lying everywhere, the tires are prone to punctures and leaks caused by pointed objects. These objects can create tiny holes in the tire and cause the air to go out. There are different ways by which you can repair these holes. Some are only temporary until you bring your ATV back to the garage, while some are more permanent. However, the latter would require tools and procedures that cannot be performed out in the open.

Seal the leak

This is one of the first things you can do as a temporary fix. This method would not require you to de-bead and re-bead. It can be done quickly done using just a few tools. This is not the definitive solution to the problem, but it can resolve the immediate issue temporarily.

One downside of this method is that the cord cannot be sealed completely, causing it to be exposed to various chemicals that can cause damage in the long run. Rust can develop, and the tire can get even messier. This problem is more common, especially for those who drive fast and whose trips are coupled with accelerations that the damaged tire might not be able to handle.

To plug the hole, you would need a tire plug kit bought at nearby auto shops.

  1. Remove the sharp object that has been causing the problem. To protect yourself, use your pliers to take the object off.
  2. Your plugs kit contains a probing tool with a rough side that can be used to penetrate the hole in and out a couple of times (around 4-5). Make sure to grasp this tool tightly because this step requires adequate power. This will remove the debris from the hole and ensure that the size of the plug will be enough fit to seal it.
  3. Put one plug in the groove of the tool that has a V-shaped pattern. A plug of the same size should be hanging freely on the other side.
  4. Penetrate the hole with the tool, leaving only around ½ inch on the outer portion of the tire. Make sure that the plug gets pushed entirely up to the level of the rubber.
  5. Grasp the plugs tool and pull it hard. This will produce a plug shaped like a mushroom on the inner portion of the tire.
  6. Remove the portion of the plug that is hanging freely out of the tire using a simple knife. You can choose to leave ¼ inch of the plug since it will get worn out easily. After doing this, you are finished!

Video Credit – JTwelder

Cover the hole

Patching the leak is deemed by many people as the correct way to fix a punctured tire. The materials needed to do this include a rubber patch of excellent quality, rubber cement, a tool for stitching, a crayon, and a liquid tire buffer. You can also purchase a tire buffer tool that is operated by an air compressor. If it is too expensive for your budget, just get something that can fit various drills. If you still do not have the budget, just buy cheap sandpaper with 120 grids.

  1. Break the bead and remove the tire with the methods above.
  2. Using your crayon, mark the hole’s location on the inner portion where the air is leaking. Use the center of the hole to approximate a 10 cm circumference. Draw a ring around this. Marking this area would help in succeeding, so make sure that it does not get erased.
  3. Use your tire buffer tool to remove the smooth portion on the inner side of the tire. The goal is to make it more challenging so that the patch you will place will ultimately stick to it. Use the ring that you have drawn as your borders. Continue this step until you can feel that the rubber is the only thing left. Do not rub the thing off so excessively that you are already reaching the tire cord. This should not last long if you are using a tire buffer tool. However, much effort and more time will be required if you manually do this with sandpaper.
  4. Once done, clean the area with a rag that has been sprayed with liquid tire buffer. This should remove the dust that has been produced by the buffing process. Wipe the part dry with a clean cloth. Notice that the area is stickier as compared to before you buffered it.
  5. Apply an adequate amount of glue using the brush that is part of your tool kit. Do not put too much glue because it is where the patch will be stuck. Cover a larger area than the size of the patch so that you can be sure that the hole will be sealed.
  6. Wait for several minutes and allow the glue to take effect. If the part is not dry, the patch will not stick to it.
  7. Slowly remove a portion (approximately ½) of the backing paper of the patch. Your fingers should not come into contact with it because this can cause the level of the stickiness of your patch to decrease.
  8. Try to check if the glue is already dry and tacky.
  9. Put the patch on the center if the glue is not wet anymore. You can apply a bit of pressure with your hands to make it work. Remove the backing paper entirely and apply pressure on the patch to make sure it sticks.
  10. The stitching tool can be used to make the patch smooth and even. Roll it over the patch on all edges several times. Begin on the center, then navigate through the sides.
  11. Orient the stitching tool perpendicularly to what you did on the previous step, then make one complete pass. The duration of this step should be approximately a minute.
  12. Remove the plastic off the patch. If you did the steps right, the patch’s edges should not be pulled together with the plastic. Otherwise, you need to take off the patch and start over again.


Mount a tube

Installing a tube can also be done if you want to stop a leak. However, this is not recommended when you are working with ATV tires. This tube can be punctured while off-road, and it will be hard for you to repair it. ATVs are commonly used in roads where sharp objects are shared, so the tires are prone to punctures. Imagine having to do patching over and over again. Such a hassle, right?

Another problem with this method is that the valve stem gets worn out quickly, especially when a small amount of air is in the tires. If you still choose to go with this method, make sure that you buy tubes meant to be mounted on ATV tires. It is recommended to purchase tubes that have TR6 valve stems for more durability.


Repairing a Leak near the Bead/Rim

This is the most frequent cause of ATV tire leaks.

Filthy bead

Since ATVs only operate with a small amount of pressure, it is expected that all forms of dirt can get squeezed in between the rim and the bead. Once all of these accumulate, it can cause a leak that will slowly worsen if left unfixed.

So, how to fix a slow tire leak? You should always break the bead at least once a year and make sure to clean all the areas of your tire. This should reduce the probability of having leaks. However, if this will not do the trick and you still get leaks from time to time, it might be best to apply a sealer or silicone that could cover the bead. You should also put some on the lip of the rim to ensure that everything is covered.

These bead sealers can be purchased in a nearby auto shop or online via a dealer. Do not put too much air on your tire because this might blow out the sealant before it gets settled. Applying bead sealants will surely fix your problem.

Rim filled with rust

Some rims are made of steel and therefore are more prone to rust. This is usually the product of water that has been trapped on the space between the tire and rim, coupled with debris such as dirt and sand. The most appropriate solution for this is to have the tire removed and cleaned using sandblasting tools and have it coated. Aside from cleaning it, the rim would also get a tight seal to prevent rust from developing again. However, if you do not have enough budget for this, here’s what you can do:

  1. Use a valve stem core removal tool to deflate the tire and then break the bead with whatever method you want to use.
  2. Prepare a solution of water mixed with dish soap and use it to clean the inner portion of the rim. Make sure to cover all the areas that come into contact with the tire.
  3. Remove the rust using cheap sandpaper with 120 grids and then progress to 180 grids. If you have power tools in your kit, the better.
  4. Cleanse the areas again with the solution, then allow it to dry.
  5. Put a bead seal or silicone on the lip of the rim before you mount the tire again. This should repair the leak that was caused by the rust. If this will not work, you might have to use green slime or mount a tube.

How to fix damaged tires

Having damaged ATV tires is inevitable, especially if you are the adventurous type who constantly deals with muddy or rocky roads. Leaks would be there after your tires have been used in these settings for quite some time.

These things can be fixed as long as the rim is intact. You may use the Dremel tool or sandpaper to remove any scratches or cracks on your tire. To be sure, you can always use a bead sealer before mounting your tire back.

Repairing a Damaged Valve Stem or its Core

If the leak is coming from the core, you can remove it and then clean it with the same water and soap solution. If this does not work, you might need to buy a new one. You should also check whether the fit is correct because that might be where the air is coming from. Since valve stems are relatively cheap, you should consider just getting a new one.

To install a new valve stem, just break your tire’s bead and then remove the old one. Before placing the replacement, clean the area first. Make sure to position it appropriately and fit it tightly with the rim. Use a valve stem tool for these procedures.

Video Credit – DIY With Michael Borders

How to Fix Cracked Tires

Broken rims can be welded back by using a TIG or MIG welder if the crack is just tiny. However, consulting an expert is recommended if you want excellent results. You might just be disappointed if you will do it by yourself.

Sometimes, you would also see bent areas on the lip of the rim, and this is usually caused when your ATV tire forcefully collides with a rock. You can fix this by tapping the curved part using a mallet to put it back into its original form. Use a mallet that is made of rubber and not metal so as not to break the rim.

Tire Slime

As mentioned before, green slime can also be used as a temporary fix, except when the involved part is a valve stem core. However, the problem with this is that it is very messy and not aesthetically pleasing. You will also find it hard to clean it the next time you change your tires. This would not sit well for customers if you have your own shop.

This method is only used if you are comfortable dealing with the mess of green slime. It is very easy to use and cheap compared to other methods. They can provide immediate fixes, even when you are out in the woods. The same principles apply. You need to deflate the valve stem core before using slime to the tire. Just put enough slime to cover the leak because excessive amounts can cause the ATV to vibrate while driving.