Maintaining your ATV is an essential part of keeping it in good condition. It isn’t nice, but it can be entertaining, and a lengthy journey in the sun in your car will inevitably result in a muddy mess. Over time, the paint of your ATV may fade and break, and it may even sustain some major scratches. If you’re like most ATV owners, you take pride in your vehicle and want to keep it looking its best. While there are many ways to clean an ATV, using the best ATV plastic cleaner is often the easiest and most effective way. However, by using some particular products and procedures to thoroughly clean and dry the area, some damages can be prevented from lingering for an extended period of time. In this article, we’ll show you how to clean your ATV using the best ATV Plastic cleaner.
The Best Products for Cleaning a Muddy ATV
For a variety of reasons, washing ATV is considerably different from cleaning a vehicle. Due to the fact that these machines have very few windows and that body panels are in short supply, the emphasis shifts away from cleaning complete quarter panels and toward cleaning gaps. To clean the ATV, you will need some materials that you likely have on hand: ATV soap, hose, plastic scraper, Air compressor, etc.
1) ATV Soap:
Check out some of the soaps that are particularly designed for off-road vehicles by going online and looking over some of the options. We recommend that you invest a little extra money and get the best of the best. Several compounds included in high-end ATV shampoos are specifically designed for the purpose of breaking away clumps of dirt. These chemicals, which are typically thick in consistency, are recognized for containing specific lubricants that aid to eliminate swirling markings and scratches from appearing throughout the cleaning process. A degreaser-based soap is the best option to clean an ATV. This soap will help remove any built-up dirt or mud, and it will also help break down any grease or oil that may have accumulated on the vehicle.

2) Washing Mitt:
A high-quality cleaning mitt has the power to increase the productivity of any automobile cleaning procedure by a factor of a million. So do some research, read some reviews, and select the best glove for your mud-covered vehicle. To avoid water contamination, remember to wash your hands in two buckets. The mitt will help keep your hands from coming into direct contact with the dirt and grime that has collected on the vehicle.
3) Upholstery Cleaner:
The upholstery of your ATV is likely to get just as dirty as the body. The fact that the chairs are water-resistant does not exclude them from becoming filthy at the conclusion of a long day on the job. Before you hose down the interior, use a strong upholstery cleaner to thoroughly clean everything from the seat covers and steering wheels to the lumbar supports and seatbelts.
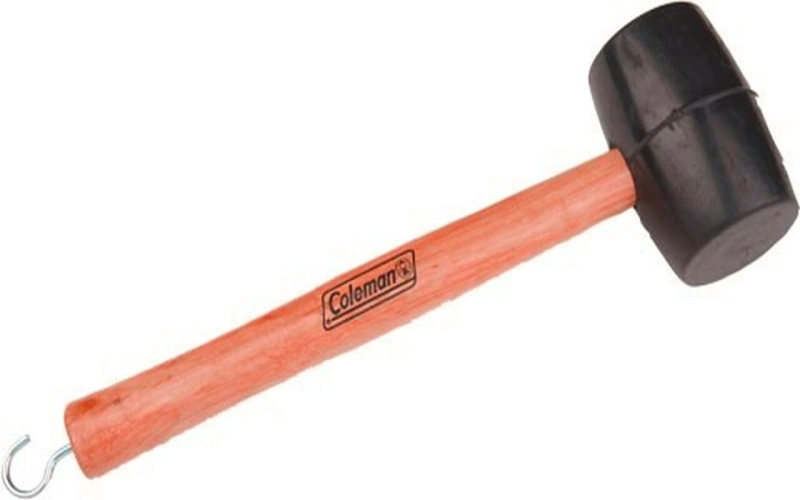
4) Rubber Mallet:
When it comes to removing solidified muck, a few taps using a rubber mallet work wonders. This is a tool that is often used in body shops for removing dust. A rubber mallet can be used to help remove stubborn pieces of mud and dirt from the crevices of your ATV. All you have to do is strike the object gently with the mallet, and it will loosen up, making it much easier to remove with a brush or scraper.
5) Plastic Scraper:
A plastic scraper is an invaluable tool when cleaning the ATV. This simple DIY tool, such as a rubber surfaces mallet, is exceptionally handy cleaning equipment, particularly when it relates to muck. It can be used to remove built-up dirt, mud, and ice from the crevices of the machine. In addition to this, a scraper can help remove dried sap and stickers from the surface of the vehicle. While it is possible to use a specialist mud scraper, many individuals opt to use a basic plastic spackle spreader or maybe a trim removal tool instead.
6) Rounded Bristle Brush:
A rounded bristle brush is a perfect tool for cleaning hard-to-reach areas on an ATV. On something as tiny as an ATV, a round bristle brush provides the capacity to wipe all sides of a confined space, which is common on these vehicles. For all of the tightest spots, we recommend utilizing a bottle brush with a tiny detachable brush attached. This type of brush is designed in such a way that the bristles are soft and will not cause any damage to the surface of the vehicle. The brush should be used with a degreaser or soap to clean away any dirt, mud, or grease that has built up over time.
7) Microfiber Cleansing and Drying Garments:
The microfiber cloth, which can be used for anything from cleaning and drying to wiping and polishing, is possibly the most useful invention. A high-quality microfiber cloth is perfect for washing and drying an ATV. These garments are designed to absorb large quantities of moisture, which makes them perfect for use on a wet ATV. In addition to their ability to soak up water, microfiber cloths also have the power to remove any dirt or debris that may be clinging to the surface of the machine. For best results, we recommend using a designated microfiber cloth for each specific step of the cleaning process: one for washing, one for rinsing, and one for drying. Make sure to stock up on these items, and be careful to review the washing instructions for microfiber because you’ll go through them at an alarmingly rapid rate.
8) Water Hose or Pressure Washer:
For washing mud and dirt off of an ATV, you will need a steady supply of water. A water hose is the most common option, but for those who want to take their cleaning to the next level, a pressure washer can be a great investment. A pressure washer can help blast away months or even years’ worth of built-up mud and dirt, making the job significantly easier. A pressure washer with the “stun” option might be used, or an ordinary garden hose with a hardcore sprayer setting could be used. To avoid a lengthy and unpleasant conflict, be certain that your water pressure is enough on both sides of the equation. Be sure to use caution when using a pressure washer around delicate areas on the ATV, such as the paint job, windows, and mirrors.

9) Air Compressor or Leaf Blower
If you need to blast hard-to-reach spots, an air compressor with a wand attachment is your best bet. However, a leaf blower would also do the trick, though in a less polished manner. These two solutions will also reduce drying periods, hence reducing the likelihood of moist spots and rust appearing on the surface. They may also be used to eliminate or release any stubborn mud or particles that may have been overlooked during the first cleaning procedure, and they are particularly well suited for blasting snorkels that supply the air filter with high pressure.
10) Chemical Protectants:
When all of the dirt, mud, and grease have been removed from an ATV, it is important to protect the surface with a high-quality chemical protectant. This will keep the ATV looking good for years to come by forming a barrier against future dirt, mud, and grease. In addition to protecting the ATV’s surface, these products also help to reduce the amount of time needed for cleaning in the future. A quality chemical protectant can be found at any automotive or motorcycle store.
Preparing for the Cleaning ATV:
Now that you have all of the necessary supplies, it’s time to get started on the cleaning process. The first step is to prepare the ATV for cleaning. This means removing any dirt, mud, or grease that has built up over time. There are a few methods that can be used for this purpose:
1) Let the ATV’s Engine and Exhaust Cool:
The safest time to clean an ATV is when the engine and exhaust have had a chance to cool down after the ride. This is especially important if the ATV has just been ridden, as the heat will make it more difficult to clean. This will help avoid any accidental burns or injuries. Allowing the engine and exhaust to cool also helps to avoid any potential accidents while cleaning.
2) Select an Open Washing Location for ATV Cleaning:
When ATVs are used, they collect a large amount of mud and dirt, and cleaning away all of that filth is a time-consuming and dirty operation. As a result, before beginning to rinse your ATV, choose a large, open area for the cleansing that you don’t bother taking dirty, and that will be simple to clean afterward. This will help avoid any accidents or mishaps while the ATV is being cleaned. It is also a good idea to have a secure place to store the ATV when the cleaning process is completed.
3) Use a Rubber Mallet to Remove Large Chunks of Mud and Debris:
If there is a lot of mud and debris build-up on the ATV, it might be necessary to remove some of it before beginning the cleaning process. By eliminating this upper layer, you’ll be able to expedite the whole washing process and reduce the amount of time required. This can be done with a rubber mallet by hitting the chunks of mud and debris until they break free. Lightly tapping these pieces will help you prevent accidentally pressing your ATV with too much force. It is important to take care while doing this, as pieces of mud and debris can fly off and cause injuries. It is also important to avoid hitting any delicate areas on the ATV, such as the paint job, windows, or mirrors.
4) Protect Vulnerable Areas:
There are some areas on the ATV that are more vulnerable to damage and should be protected while cleaning. Water should be kept away from critical areas of your ATV, such as the front outlet of the exhaust and the ignition switch, at all costs. These include the paint job, windows, mirrors, and any other delicate areas. One way to protect these surfaces is by using a soft cloth or towel. Another way to cover the keyhole and the back aperture of the exhaust with a plastic sheet and tape them together. This will help avoid any scratches or damage that may occur while cleaning.
Video Credit: ATVonDemand
ATV Plastic Damage Variations:
When cleaning your ATV, it is important to be aware of the different types of plastic damage that can occur. This will help you take the necessary precautions to prevent any damage from happening. There are three main types of plastic damage that can occur:
* ATV Scratches:
The simplest type of plastic damage is scratches. These can be caused by a number of things, such as using the wrong cleaning product or scrubbing too hard with a brush. Light scratches and deep scratches are the two sorts of scratches that you’ll encounter the most regularly. Light scratches are those made by branches or shrubs slapping against the plastic and leaving only a faint impression on them. Deep scratches are much more severe and go all the way down to the plastic’s base layer. They are often caused by a sharp object, such as a rock or a key. To prevent scratches from happening, it is important to use the correct cleaning products and to avoid scrubbing too hard.
* ATV Cracked Plastic:
Cracked plastic is another common type of damage that can occur on the ATV. This usually happens when a heavy or sharp object falls onto the plastic and creates a fracture in it. The crack will then spread until the entire piece of plastic breaks off. To prevent this from happening, it is important to be aware of what you’re doing when you’re cleaning and to avoid dropping anything onto the ATV.
* Fading and discoloration of ATV plastic:
The final type of plastic damage that can occur is fading and discoloration. This happens when the plastic is exposed to too much sunlight or heat for an extended period of time. The UV rays from the sun will cause the plastic to become brittle and will eventually fade it to a yellowish color. The only way to prevent this from happening is by shielding the ATV from direct sunlight. You can do this by using a cover or placing it in a shady area.
FAQ
1) What prevents mud from clinging to the ATV?
Mud and debris can be difficult to remove from an ATV because it often clings to the surface. This is especially true if the ATV has been ridden in moist conditions. One way to help reduce the amount of mud and debris that accumulates on the ATV is by using a quality chemical protectant. This will form a barrier between the ATV and the mud, which will make it easier to clean in the future.
2) How can I protect the ATV plastic?
There are a few ways to protect the plastic on your ATV. One way is to use a quality protectant that can be found at any automotive or motorcycle store. Another way is to keep the ATV clean and waxed on a regular basis. This will help to reduce the amount of time needed for cleaning in the future. A quality chemical protectant can be found at any automotive or motorcycle store.
3) What is the best way to clean ATV seats?
The best way to clean ATV seats is by using a wet towel and a small amount of soap. Be sure to avoid getting the seats too moist, as this may cause damage. Once the seats are clean, allow them to dry completely before using them again.
4) When waxing ATV plastics, what process do you use?
The best way to wax ATV plastics is by using a soft cloth and a small amount of wax. Be sure to avoid getting the wax on any delicate areas, such as the paint job, windows, or mirrors. Apply a thin layer of wax to the plastic and allow it to dry completely before buffing it off with a clean cloth.
5) Why do you need to wash your ATV after each ride?
Washing your ATV after each ride is important because it helps remove any mud or debris that may have accumulated on the ATV. This will help to prevent any damage that may occur while the ATV is being cleaned. It is also a good idea to wash your ATV after every ride to help keep it looking new.
6) What should I do if my ATV starts to fade?
If your ATV starts to fade, you may need to apply a new coat of wax. Be sure to avoid getting the wax on any delicate areas, such as the paint job, windows, or mirrors. Apply a thin layer of wax to the ATV plastics and allow them to dry completely before buffing them off with a clean cloth.
Final Thought:
This article provides information on the best ways to clean and protect your ATV with plastic cleaner. Keeping your ATV clean and well-maintained is an important part of owning one. By pursuing these instructions, you can help reduce the amount of time needed for cleaning in the future. Be sure to use a quality protectant to keep your ATV looking new for years to come. It is important to take care when cleaning ATVs, as pieces of mud and debris can fly off and cause injuries. It is also important to avoid hitting any delicate areas on the ATV while cleaning it. If your ATV starts to fade, you may need to apply a new coat of wax. By following these simple tips, you can help keep your ATV looking its best.